It’s hard to believe that I’ll be able to actually celebrate Valentine’s Day this year!
Last year? I had surgery on February 13th. That was fun. (You can read about it here in my post Surgery Hair and Other Random Thoughts… and the heavy dose of reality follow-up post My Ureter Hurts! How many people can say THAT? ) And two years ago? I had surgery on February 14th. Was that frustrating for me, not being able to celebrate a day full of romance? Not really. You see, way back in the early ’90s, I was diagnosed with cervical cancer on Valentine’s Day. Yep. So for many years, that “holiday” was more or less of a marker for me in terms of the cancer being in remission, and so on.
So. This year I actually decorated for Valentine’s Day. I didn’t go overboard, but it was nice to decorate our living room mantel and put together a few pretty things around our home.
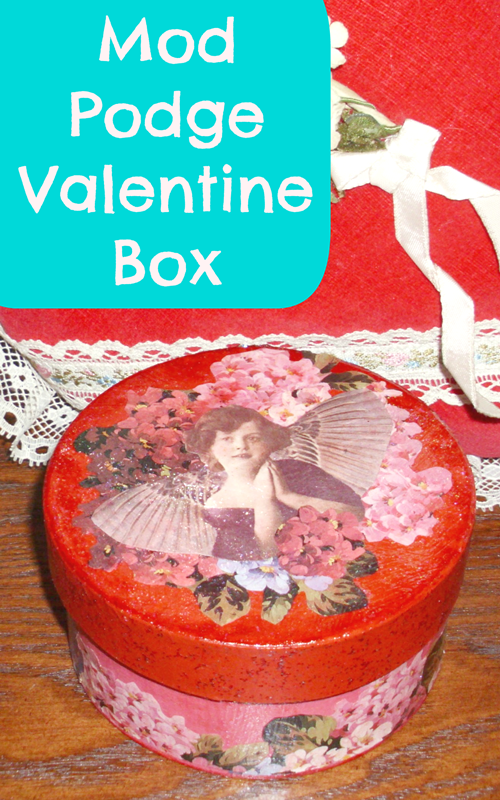
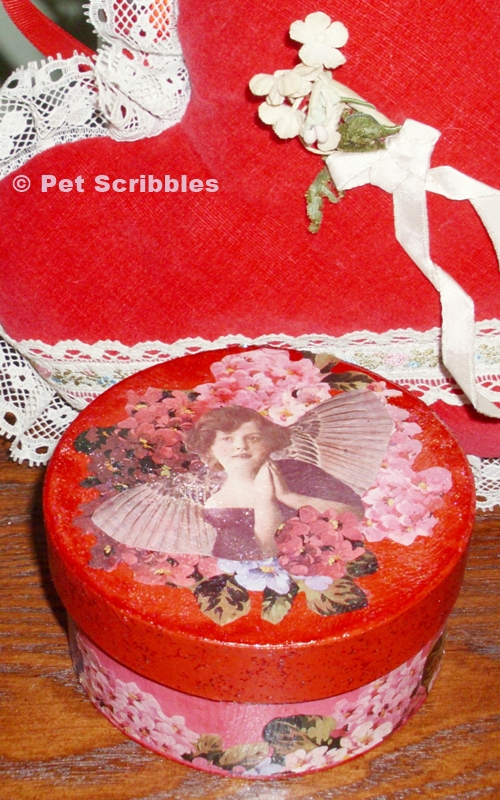
One craft I’ve wanted to make for the past few years is a vintage-style decoupaged box for Valentine’s Day, something I could display with my other vintage-style decorations. I’ve seen these in various gift shops on occasion, and I’m happy to share with you how I made mine!
Supplies:
- Foam brush
- Paper ephemera (personal collection)
- Small scissors
- Paper maché box
- Mod Podge
- Sparkle Mod Podge
- Distress Ink in Fired Brick
- Acrylic paint in two coordinating colors
- Acrylic sealer
Tutorial:
All set? Here we go! (Please read through all of the steps before making your own decoupage box.)
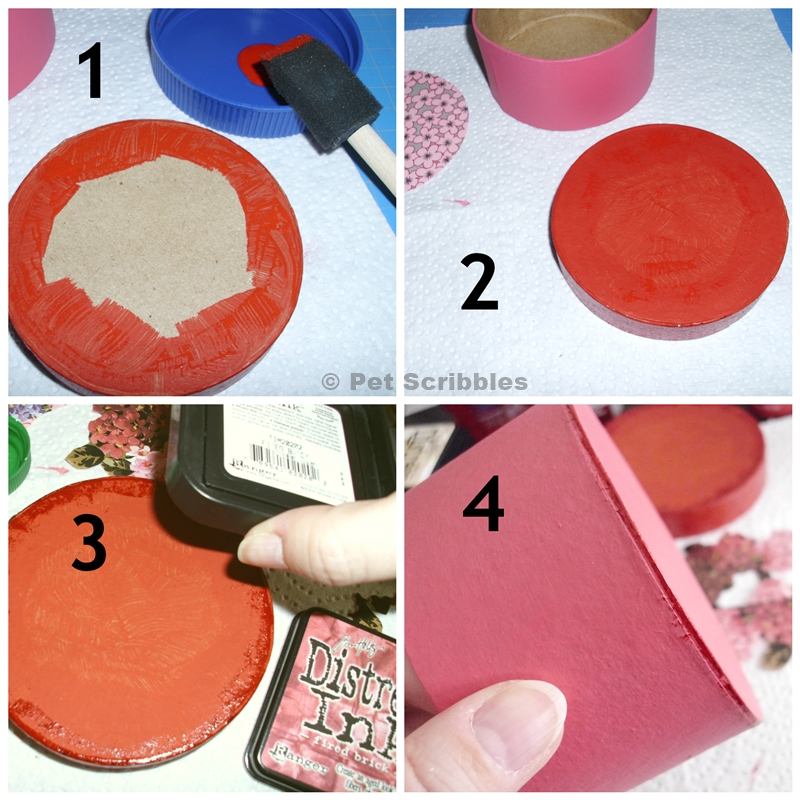
Steps 1 and 2: Paint the box and the lid. I painted the box with three coats of hot pink, and painted the lid with three coats of bright red. I only painted one coat on the center of the lid, since that area would be covered with decoupaged papers.
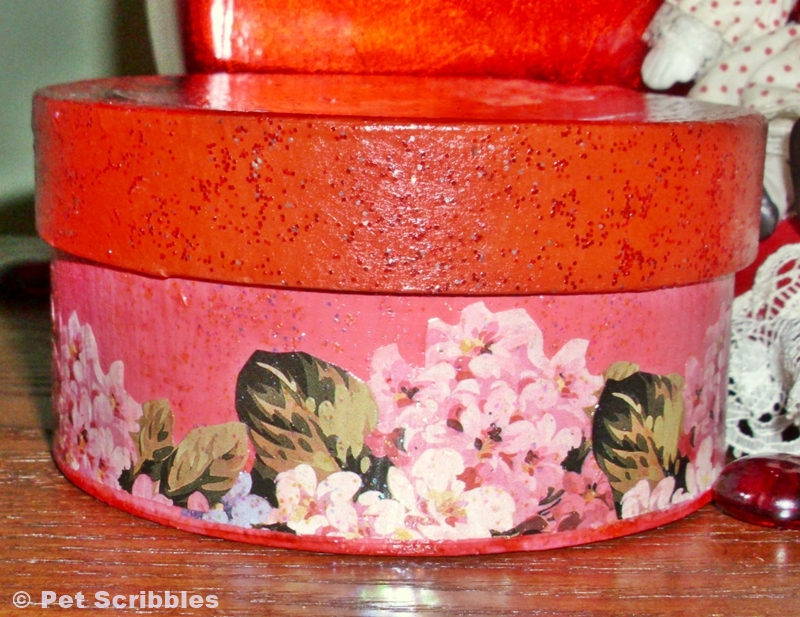
Steps 3 and 4: Once the paint was dry, I distressed the rims of the box lid and the box itself with Distress Ink in Fired Brick. Let dry.
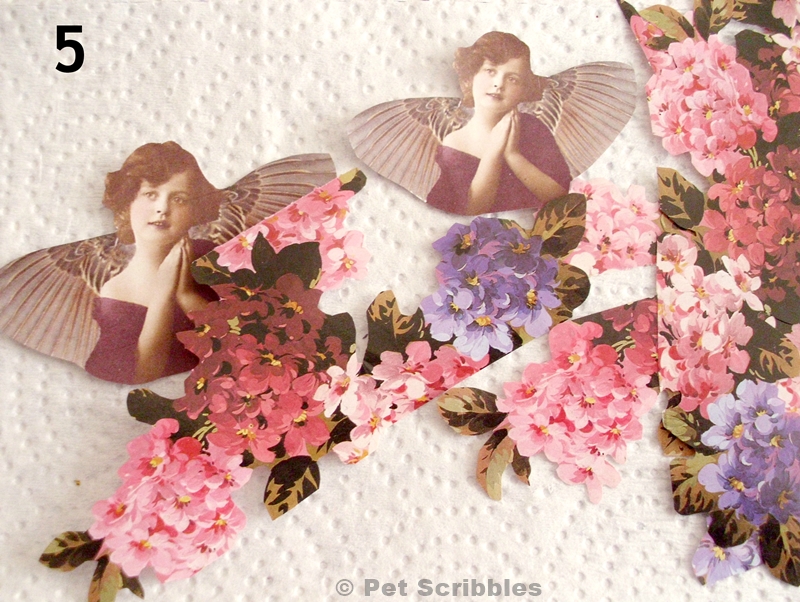
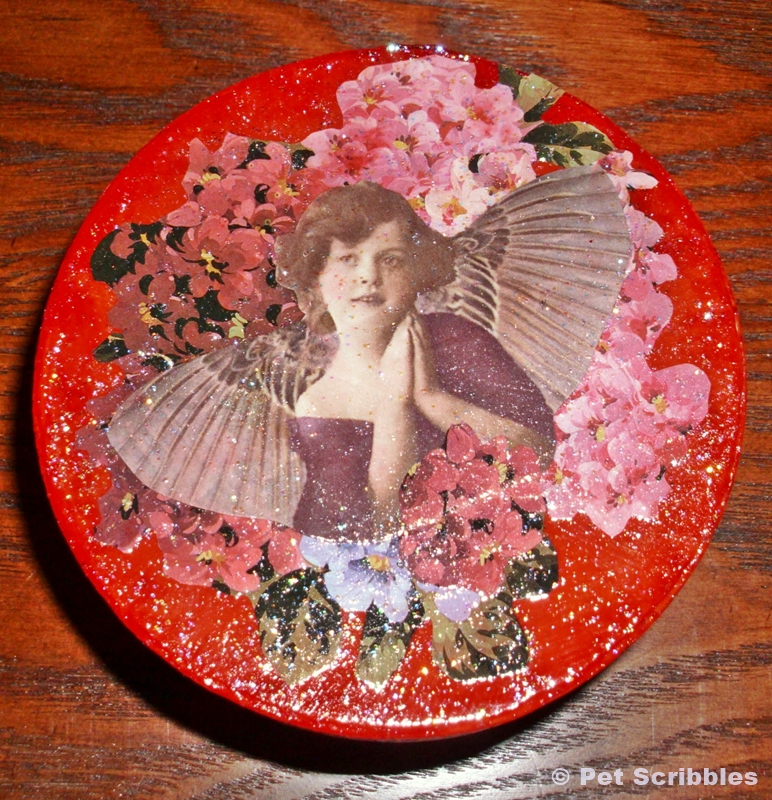
Step 5: Next I needed to decide on the paper ephemera I wanted to use. If you scroll back up to “picture 2” you’ll see a pretty floral circle on the left-hand side of that shot. I was initially going to use it, which would have given me a more contemporary look. I had just about finished convincing myself to use it, when I spied these hydrangea images in my stash. That led to more digging into the stash and I found this pretty girl with angel wings. Yes, I’m a vintage-style gal at heart!
Super Important Tip coming up!
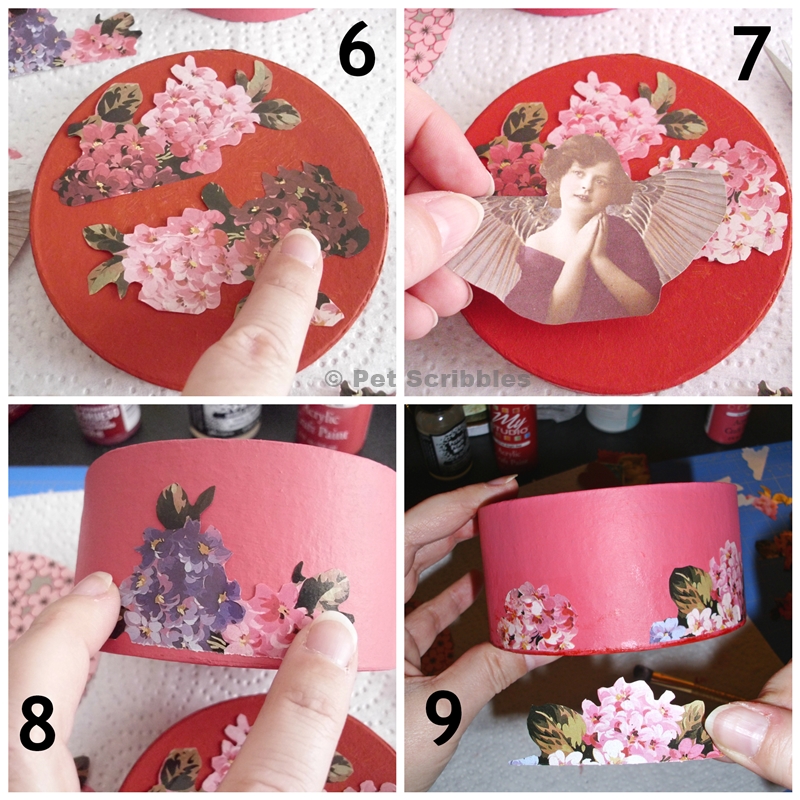
Steps 6 and 7: After cutting out my papers, I next spent some time laying out their placement on the lid. In some cases, it meant snipping a bit off here and there to make sure the placement was pleasing. I also figured out how I wanted to layer some of the pieces to create depth. Once I was pleased with how everything looked, I glued everything down with Mod Podge, applying glue both to the lid itself as well as to the back of the papers. I smoothed everything out with my fingers. I didn’t need to use a brayer as these pieces were small enough where “finger-smoothing” worked just fine! Then I put it aside to dry.
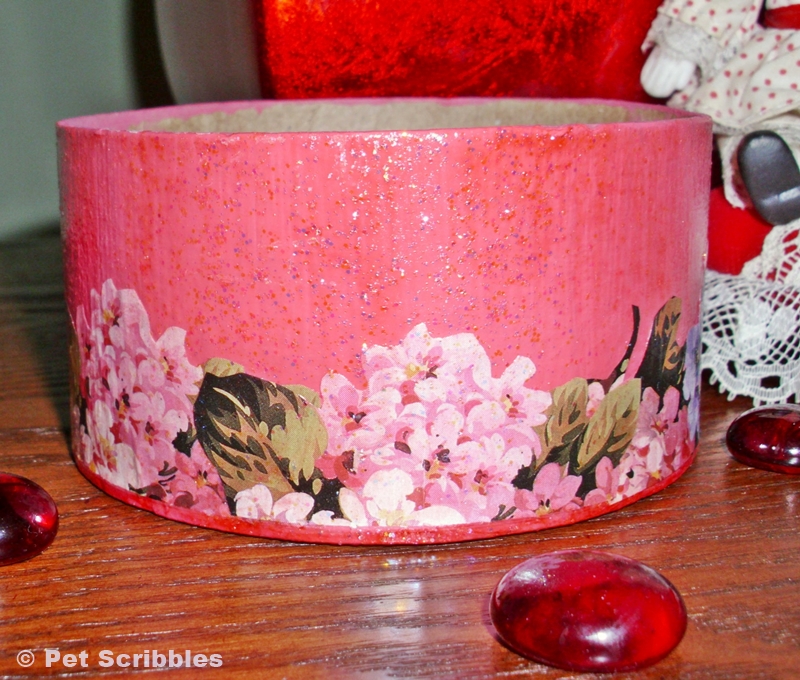
Steps 8 and 9: While the lid was drying, I played with the placement of the hydrangeas around the box. Keeping in mind that the lid will hide some of the box, I knew that I wanted the hydrangeas to wrap around the bottom half of the box. I did the same steps as for the lid: placing, layering, then applying the Mod Podge. After it dried a bit, I applied some Distress Ink (in the same Fired Brick color) to the box to take away the one-dimensional look of the flat acrylic paint. Then I let everything dry.
Here comes the Super Important Tip!
The success of your decoupage project will depend (in large part) on time spent figuring out the placement and layering of your paper pieces.
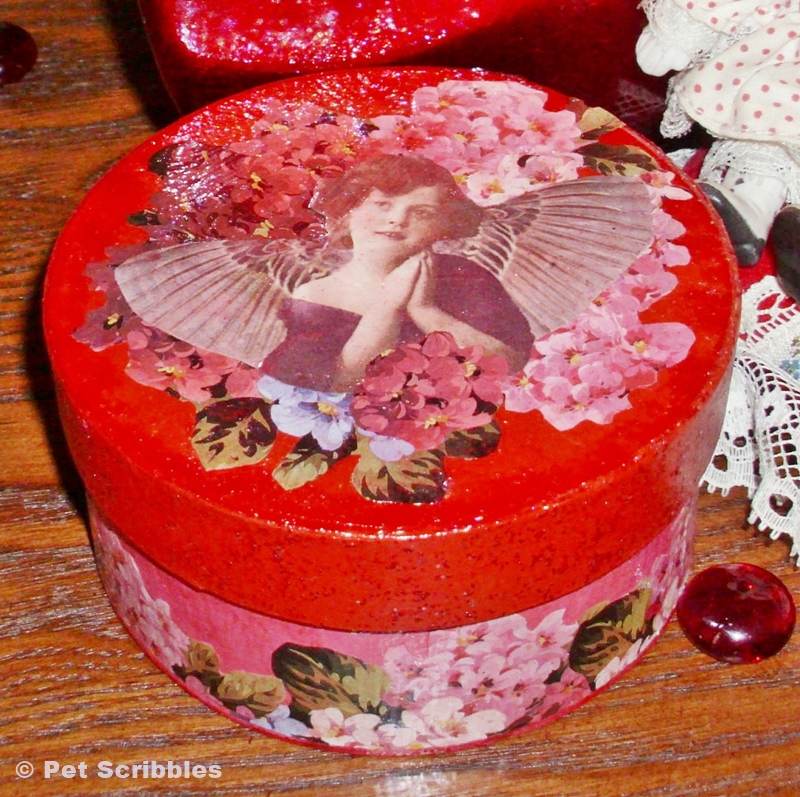
I truly believe this. Decoupage is all about attention to the details, both big and small. Even after I thought I had the layout all set for the box lid, I walked away for a short while before returning to take another look. Yes, more minor tweaks, including the addition of a hydrangea “bouquet” layered onto the image of the angel girl to provide more depth and another shot of the reddish-burgundy floral color.
The same tip held true for the box itself, as I realized I needed more of the blue and the reddish-burgundy florals to counterbalance the main pink florals.
Step 10: Cover the lid, the side of the lid, and the box with one coat of Sparkle Mod Podge. Let dry. I like to place the lids and boxes on top of a large can or bottle of whatever is handy on my craft table. This helps it dry without getting stuck onto anything if the glue seeps down the sides…which it shouldn’t do because I didn’t glop it on, but you know – it could happen!
Here’s some close-ups so you can see the sparkle.
I love glitter, and I love that this glitter isn’t going to flake off because it’s embedded in the glue. I think Sparkle Mod Podge is right up there with the best inventions ever made, like the air conditioner and the hair dryer. Hmmm…. two things that blow air… I’m not sure what that means. I’m not sure I want to know what that means!
Final Step: Seal the box with a spray-on acrylic sealer.
And that’s all there is to it!
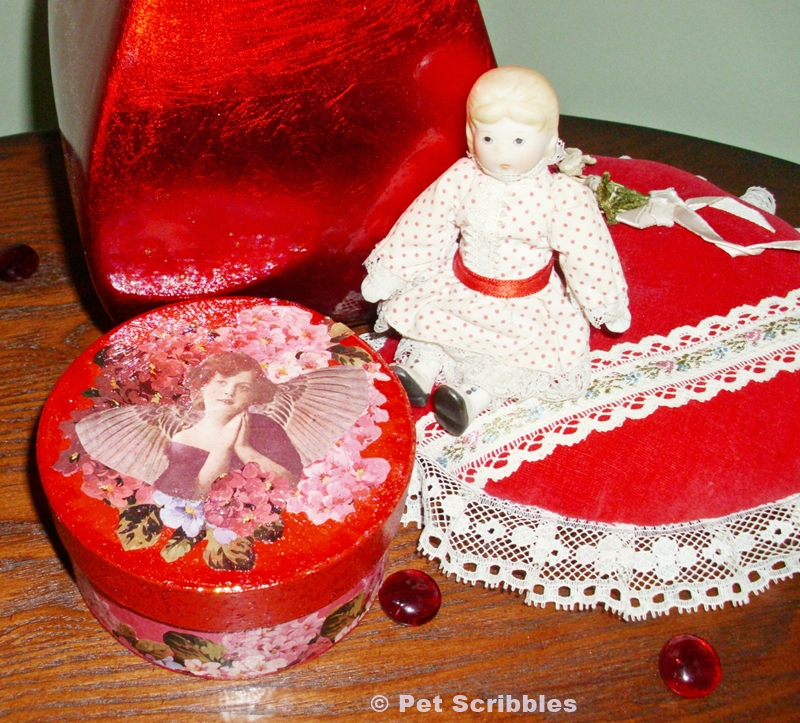
Here’s the box with some of my other Valentine’s Day decorations which I’ve had since my childhood: a sweet little bisque doll, and a heart pillow that was handmade. Both of these were gifts from my parents. My mother always came up with something sweet as a small Valentines gift each year. I’ve said it before: my mother definitely helped foster my love of all things vintage!
I love my sweet vintage-looking decoupage box!
How about you? Are you into the vintage-style Valentine’s Day decorations, or are you drawn to more modern designs and patterns?
Happy crafting!

It’s definitely all in the details – and yours is detailed perfection!
Here’s to a very happy and healthy V-day Laura! Can’t wait to meet you!
Kelly
Why thank you Kelly, both for the compliment and the well wishes! I’m really looking fwd to meeting you too! 🙂
Lovin’ the vintage look! So pretty! Isn’t Sparkle Mod Podge the best?
Indeed: Sparkle Mod Podge is fantabulous! 🙂 Thanks Jill!
It is beautiful, Laura! The sparkly Mod Podge is the perfect finish. I will be your Valentine any day 🙂
You are so right about figuring placement before adhering. So many projects it took for me to get that important fact!
Why thank you Johnnie, I’m blushing! 😉