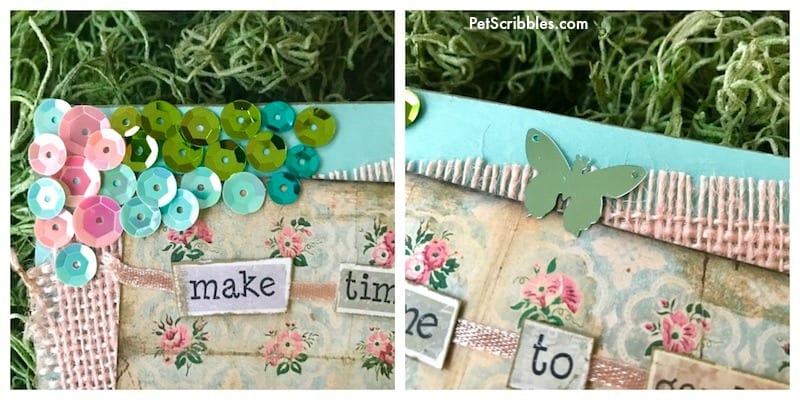
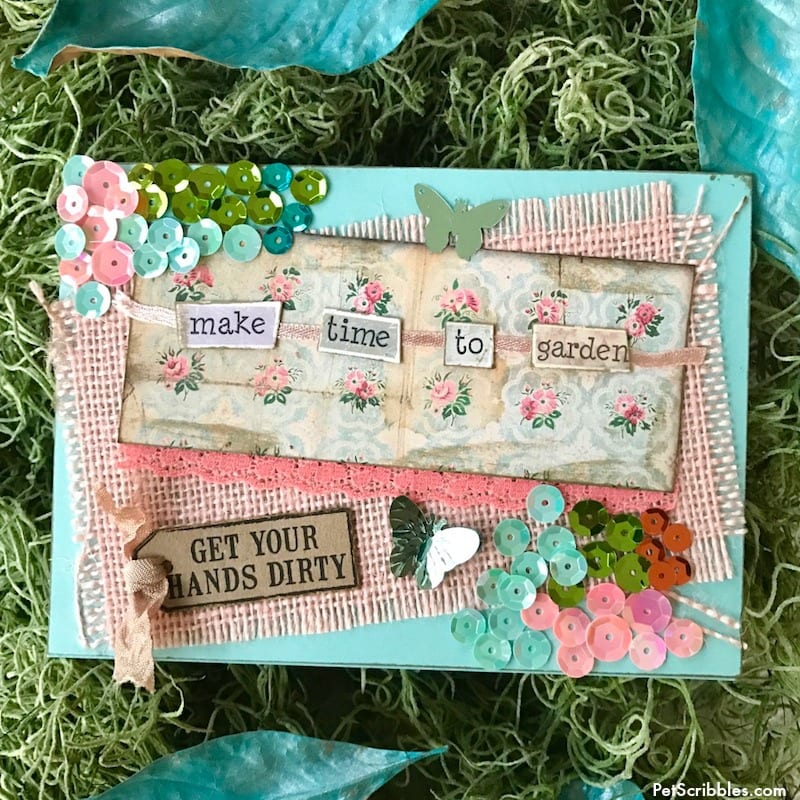
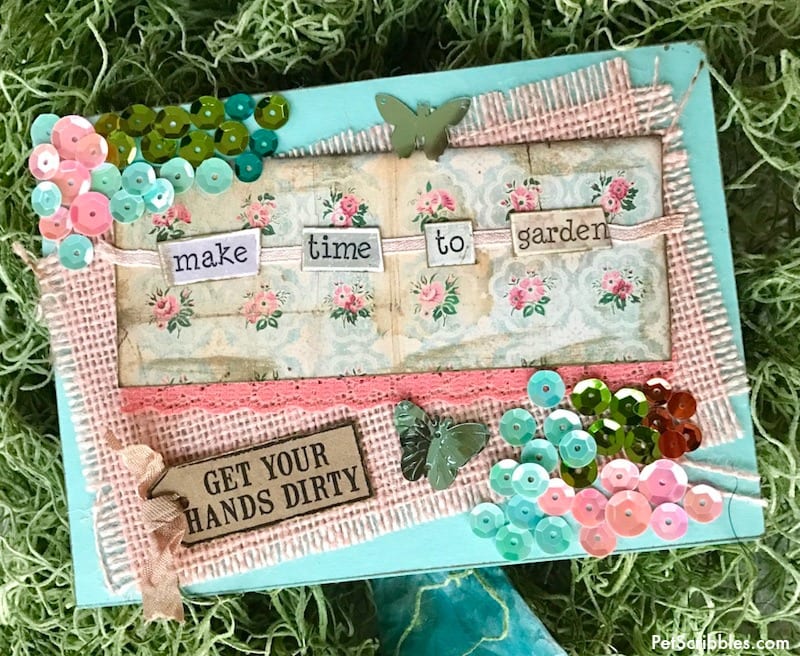
I’m over-the-moon excited to be on the 2017 Xyron Design Team, and today I’m sharing a DIY handmade card: Time to Garden. This is a card with just a few layers and embellishments, so it’s easy to reproduce if you want to make your own!
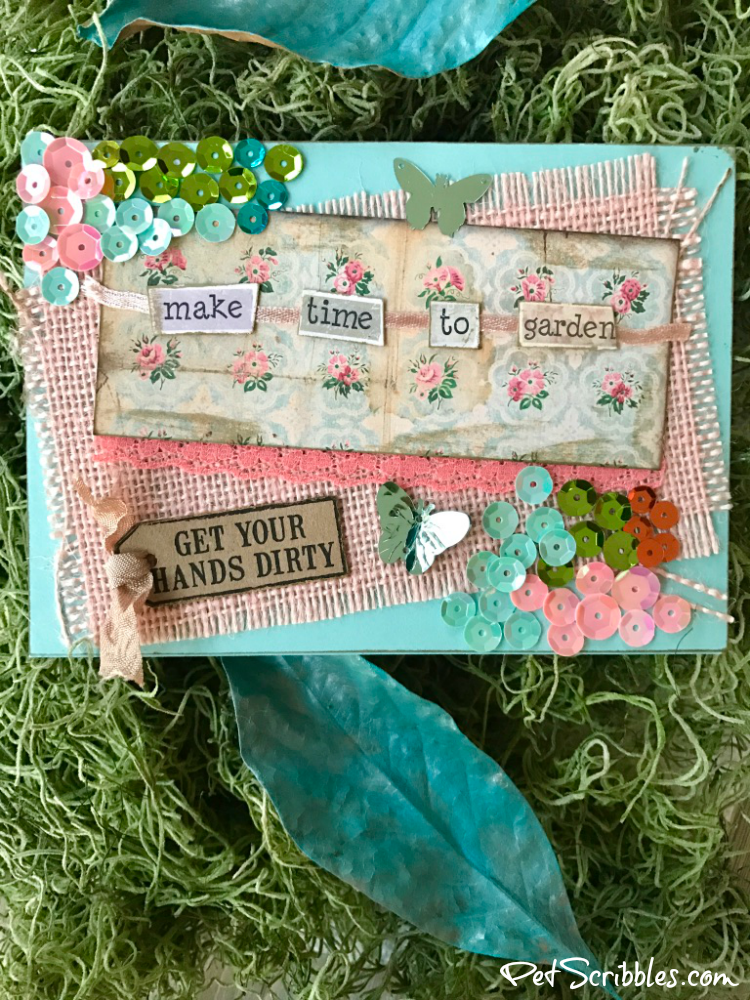
One craft category I seem to have neglected to share here is handmade cards, which is funny because Pet Scribbles was formerly a pet-themed handmade greeting card company. And, I’ve never stopped making cards, so I’m not sure why it didn’t occur to me to share those with you.
Well, today that’s about to change!
DIY Handmade Card: Time to Garden
FTC Disclaimer: I’ve received products/compensation as part of the Xyron Design Team. This card, however, is 100% my own project! Some of the links in this post are affiliate links. I explain more here.
Supplies:
- Xyron® Creative Station Lite
- Xyron® Mega Runner
- Xyron® 1.5″ Sticker Maker
- card blank
- burlap scrap – Canvas Corp
- decorative paper scraps – 7Gypsies
- Distress Ink Pad – Ranger/Tim Holtz
- pastel sequins
- butterfly sequins
- ribbon scrap
- vintage seam binding scraps
- scissors
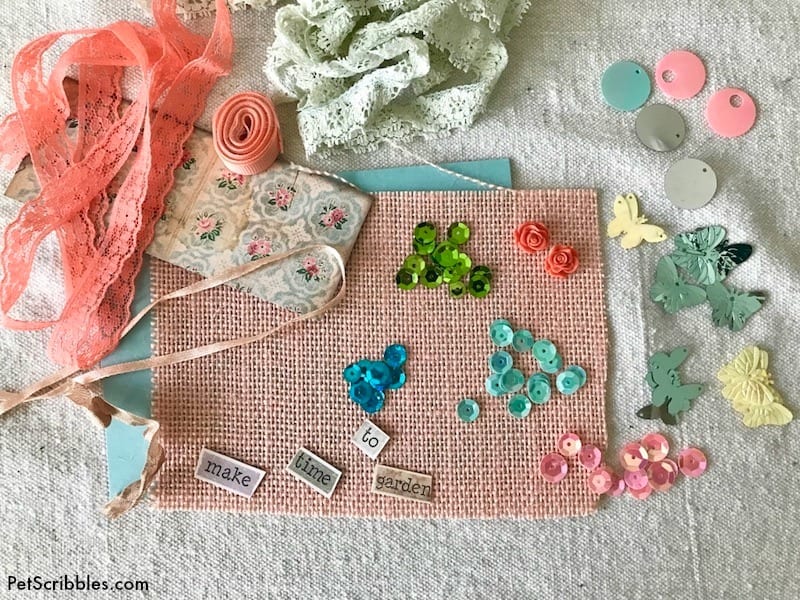
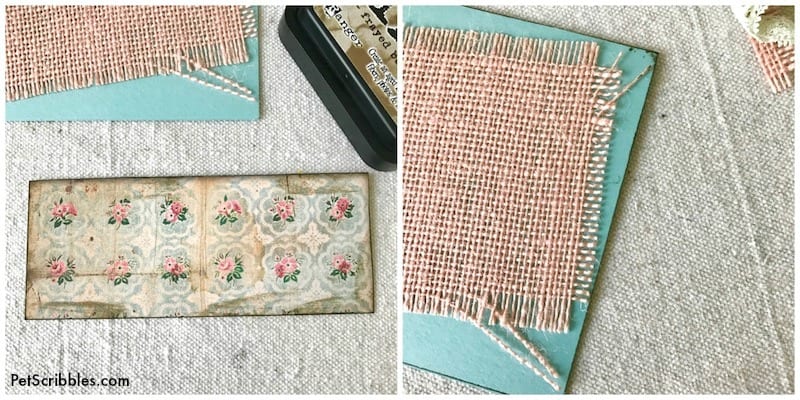
Step One: Gather some things to play with! I always like to start with a few elements and then add different textures and embellishments that may — or may not — make it onto the final card. My inspiration started with the vintage floral paper from 7Gypsies (below). Once I matched it up with the pink burlap and the turquoise card blank, I knew I was on my way!
Step Two: Trim the burlap scrap to a size slightly smaller than the dimensions of your card.
Step Three: Apply adhesive to the back of the burlap scrap.
Wait. WHAT? How is that possible, you ask?
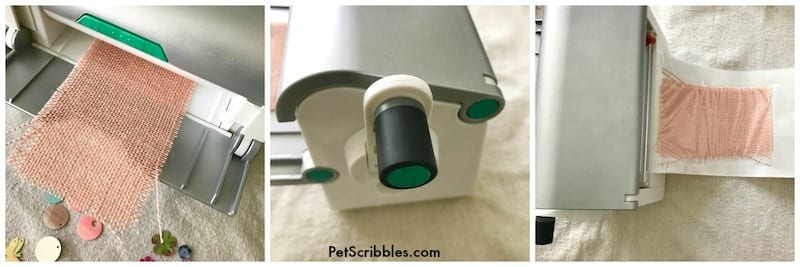
By using the Xyron Creative Station Lite! This little machine packs a seriously sticky punch. First, I place the burlap scrap in the tray, making sure the front edge is all the way in. (below left) Next, I use the handy handle and simply turn it. (middle) Out comes the burlap now in the form of a sticker. (below right)
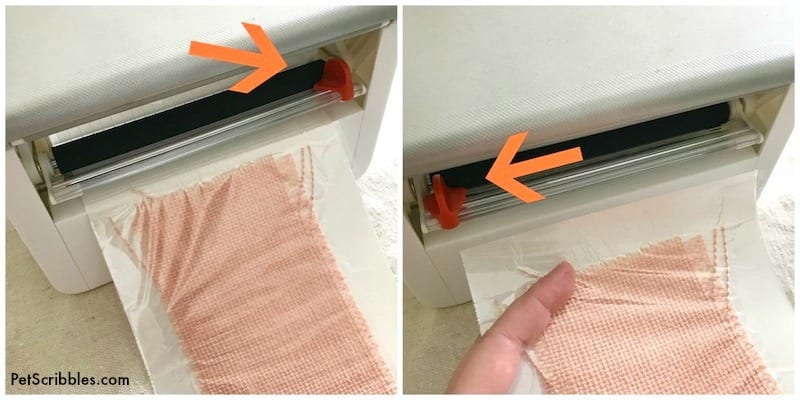
Next, use the orange lever (below left) and slide it to the opposite side. (below right) This cuts off your sticker nice and neat! Or neatly!
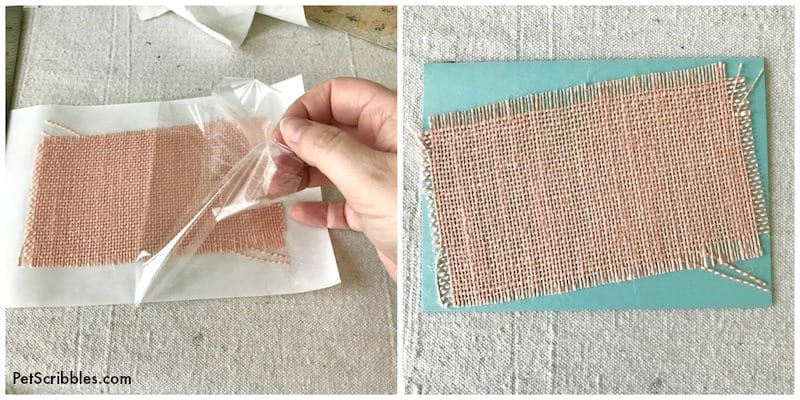
Remove the plastic covering — which is sticky — and you’re left with your burlap scrap, adhesive on the back, all set to go! (below left)
Step Four: Attach the burlap scrap to the card blank. Gently peel up the burlap scrap, so you don’t rip it, when removing it from the sticker backing. I love how the frayed edges even stick down nicely with this adhesive! (above right)
Step Five: Ink the edges of the paper scrap and card blank for a vintage look. The paper scrap already had an inked look on a couple of the edges, but when I cut it out, I needed to match up the “fresh” edges. I also inked the edges of the other paper elements, including the tiny word scraps.
As I played with the placement of the floral paper scrap, I decided to have a piece of vintage lace seam binding peek out from underneath the scrap.
Need to add adhesive to delicate vintage lace seam binding?
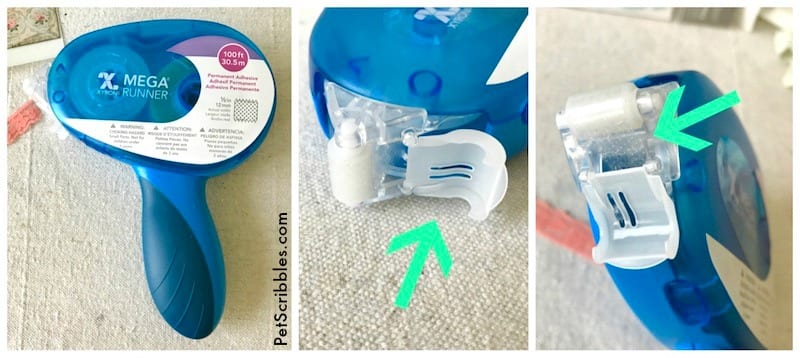
Xyron Mega Runner to the rescue! (below left) The Mega Runner is like a tape runner on steroids! It comes with 100 feet of permanent adhesive. It has a handy cap that opens/closes to protect the exposed adhesive. (below middle) And most importantly, this adhesive is a bunch of dots, not a solid adhesive tape. (below right)
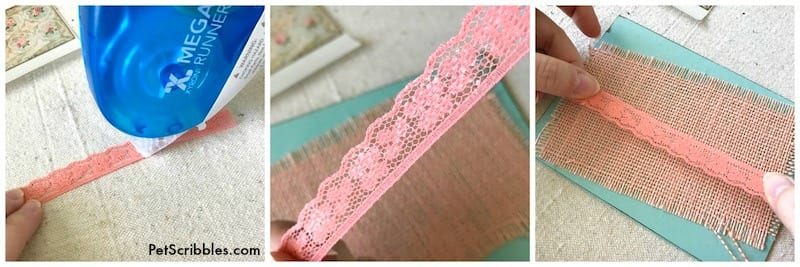
Look closely, and you’ll see a dotted pattern on the adhesive tape. This adhesive will only stick to what’s there. In other words, if I have a scrap of lace with holes in it — as lace tends to have — no adhesive will be sticking through the holes. Genius! Brilliant!
Step Six: Apply adhesive to a vintage lace seam binding scrap and attach to the card. I applied the adhesive in small little strokes, as I didn’t want to stretch or rip the delicate seam binding. See the middle picture below for what the adhesive looks like on the ribbon scrap.
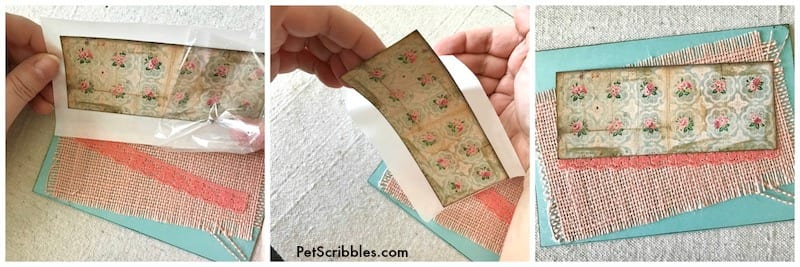
Step Seven: Attach the floral paper scrap to the card. I ran this paper scrap through the Xyron Creative Station Lite — like I did for the burlap.
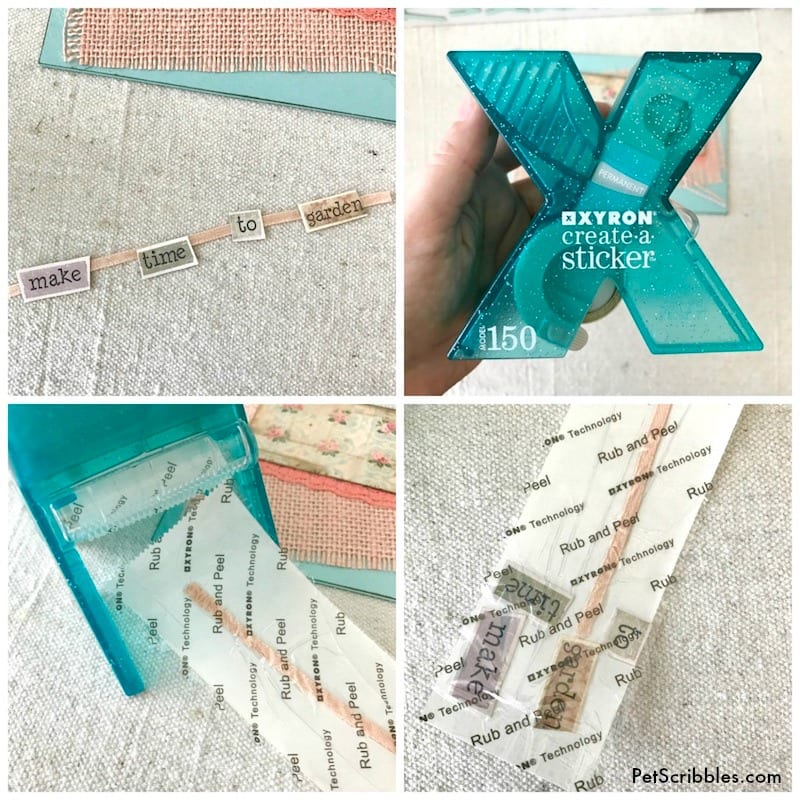
Now it was time for me to add my tiny word scraps and a super-thin ribbon scrap to my card. This time I used my handy Xyron 1.5″ Sticker Maker, which is made to turn tiny elements into awesome stickers. My gorgeous glittery aqua version I’ve had since 2004. Yes, that’s how durable these little guys are! (These sticker makers also come in different widths too!)
Run your tiny embellishments — in my case the thin ribbon and word scraps — through the Xyron Sticker Maker just like you would through the Xyron Creative Station Lite. Same concept I shared earlier.
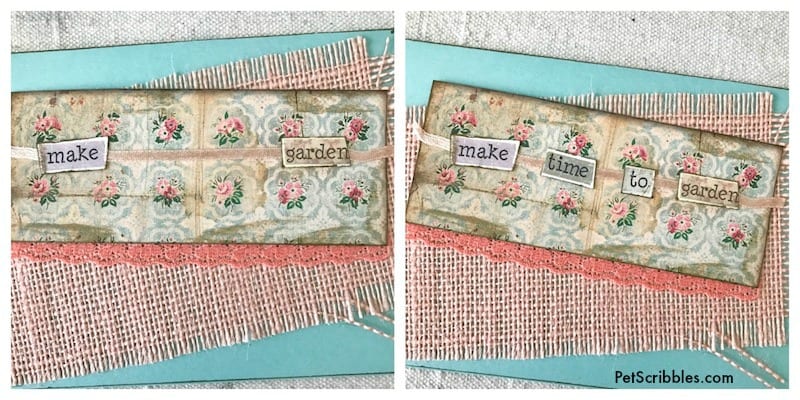
Step Eight: Apply adhesive to your word scraps and a thin piece of ribbon, then attach to the card. To help my eyes evenly space these words apart, I attached the first and last word (below left) and then filled in the rest of the phrase. (below right)
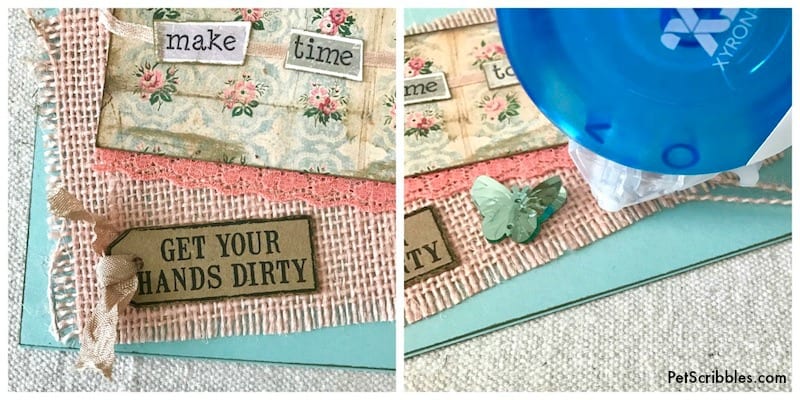
Step Nine: Begin adding your embellishments around the main design. I distressed and inked the edges of the kraft tag (below left) and added a bit of vintage seam binding to it. Next I made a dimensional butterfly by attaching two butterfly sequins together (using the Mega Runner) and bending the top sequin’s edges up. (below right)
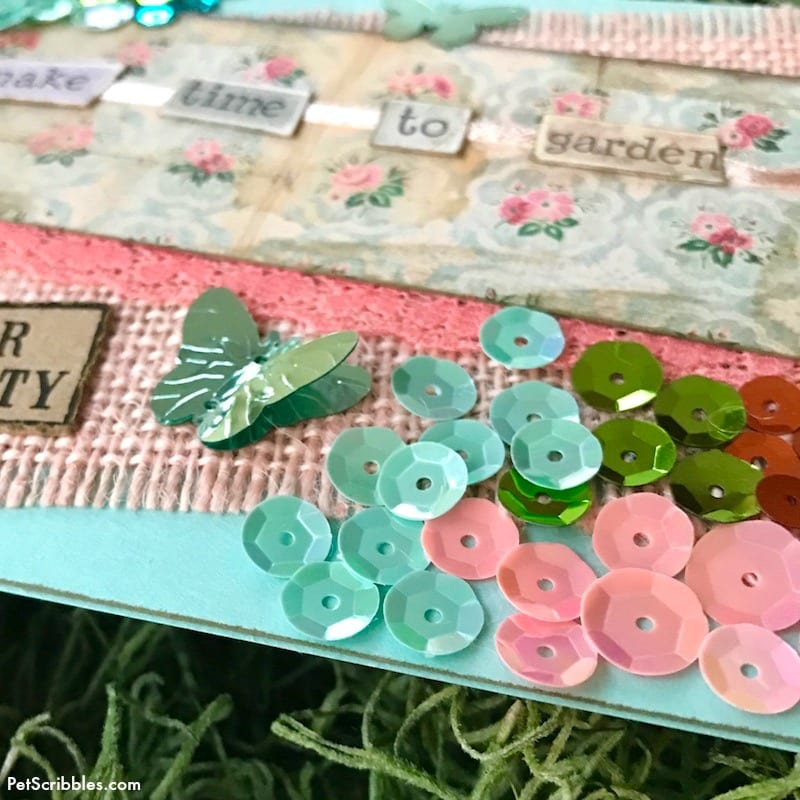
I used my Xyron Mega Runner to apply adhesive to the bottom left of the card, then pressed pastel sequins onto the card, to resemble flowers.
On the top right corner of the card I repeated the process — more sequins to looks like flowers. (below left) I also attached a flat butterfly sequin. (below right)
And that’s all there is to it!
It may be only February, but with the warm weather we’ve had here in southern New Jersey it feels like Spring already. Making this Time to Garden handmade card was my way of getting a Spring gardening fix without actually jumping the gun too early outdoors!
I painted the magnolia leaves stuck in the mossy background in these photos. You can see my easy DIY here.

To learn more about Xyron’s awesome adhesive products, click here.
Happy crafting!
~Laura

