Want to learn how to make beautiful shabby paper flowers? I did too, so I finally bought a Sizzix Big Shot machine and some flower dies and I. Am. Addicted. To. Making. Paper. Flowers.
I’m definitely late to the Sizzix party, but man am I having a blast with my new toy! So many of my craft blogger friends have used the Sizzix Big Shot machine over the years to create some truly stunning crafts and home decor accents. But I never quite understood “how” it all worked.
Last month I decided to buy myself a Sizzix Big Shot on Amazon (affiliate link). I also bought this Eileen Hull flower die (affiliate link).
Supplies:
- Sizzix Big Shot machine (affiliate link)
- Eileen Hull “Flower, Romance” Die (affiliate link)
- DCWV “Vintage Essentials” Paper Pack (DCWV = Die Cuts with a View)
- paper trimmer
- cotton swabs (24) with one end broken off of each
- small water misting bottle
- Tattered Angels Chalkboard Glimmer Mist in Jade
- Tattered Angels Glimmer Glaze (glitter paint) in Sweet Pea Pod
I also needed one more supply that I didn’t have on hand — I rarely ever do — which was patience! LOL
Seriously, I knew this was going to be a long project for me, because I truly wanted to make a TON of paper flowers at once. What better way to immerse myself into learning how the Sizzix Big Shot works, right?
Actually, the only time my own patience was tested throughout this project was when I decided to take all of the flowers apart and start over again.
Yes, I did that.
The flowers came out too perfect the first time, and I’m all about celebrating the imperfect!
A quick overview of the Sizzix Big Shot machine
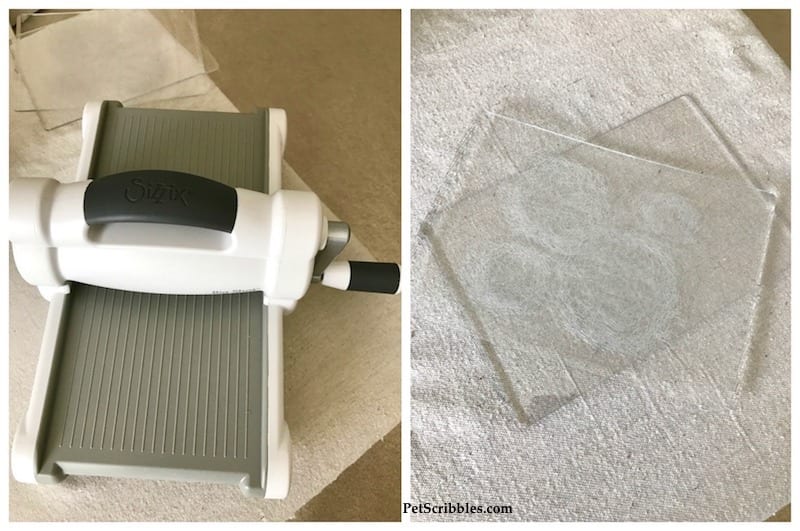
Below left is the Sizzix Big Shot machine. It’s a simple machine that does amazing things. Below right are the two cutting pads that I use to make my Sizzix sandwiches. (I’ll get to that in a sec.)
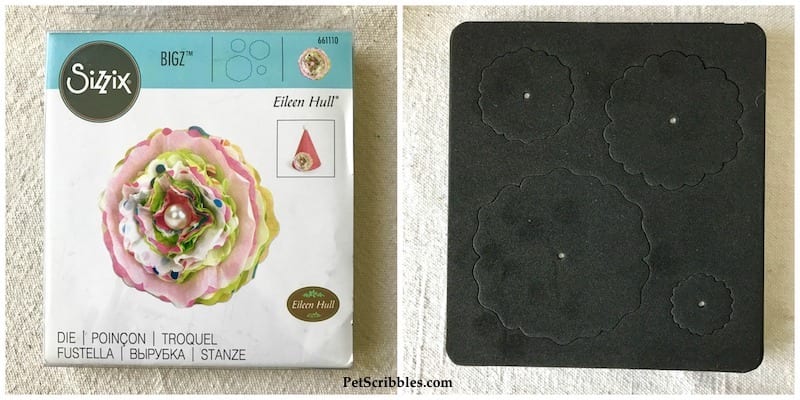
Here’s what the Eileen Hull flower die looks like in the packaging (below left) and the actual die itself (below right).
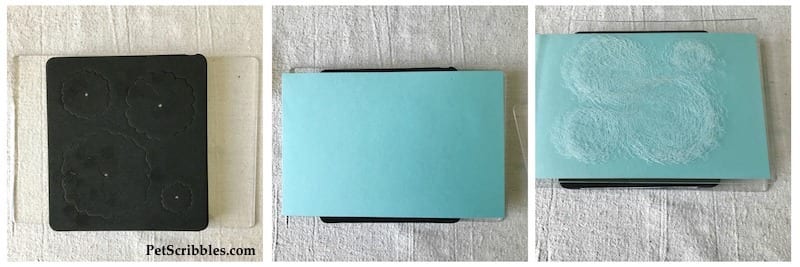
When you’re using a Sizzix machine, you make a Sizzix sandwich with your chosen material (paper, fabric, felt, etc.), your chosen die, and the cutting pads.
On the bottom is one cutting pad, next is the die with the design cutting side up, then your material (in my example I’m using aqua cardstock), topped with the other cutting pad.
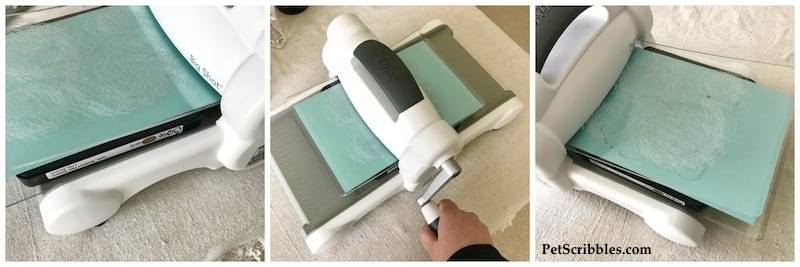
Place this Sizzix sandwich into the machine until it sort of stops (below left), then turn the handle manually (below middle) which makes the die travel through the machine. On the other side, out come your die cuts!
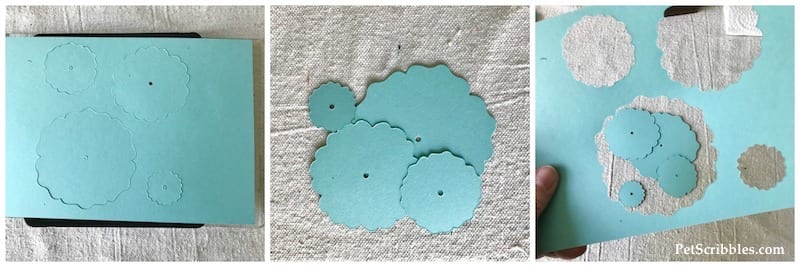
Remove the top cutting pad, and this is what you’ll see (below left). The individual shapes pop out easily (below middle). Sometimes I’ll save what is left over, as those can also work nicely in your scrapbook layouts, cards, or mixed media pieces. (I save everything. I’m shaking my head as I type this!)
So that’s your super-brief overview of the Sizzix Big Shot Machine. Click over to the Sizzix website to learn more — they have a ton of helpful info on there!
How to make beautiful shabby paper flowers!
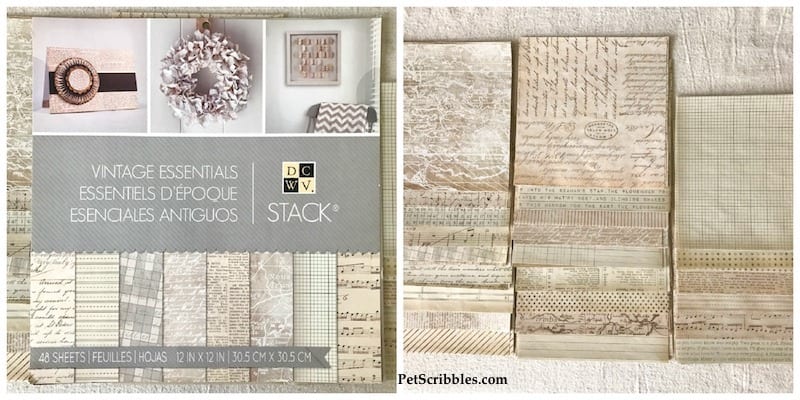
If you want to make a lot of flowers at once, there’s nothing better than using a 12 x 12 paper pad, and that’s just what I did. I’d been saving a DCWV (Die Cuts With A View) paper pad (below) for quite some time, and now I had the perfect project!
The first thing I did was use a paper trimmer to cut each sheet into four pieces. This paper was very lightweight — like a heavy tissue paper, if that makes any sense…or maybe more like a newsprint weight.
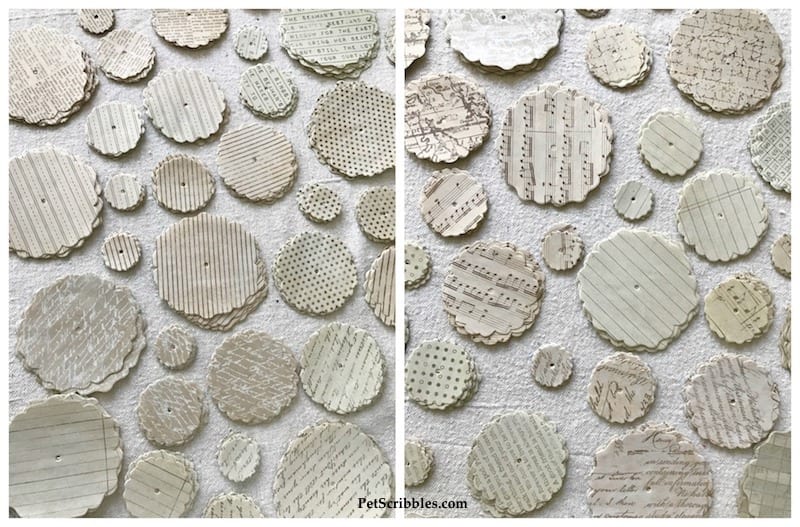
Next, I ran the four sheets at once through the Big Shot, so getting my flower shapes made was easy peasy.
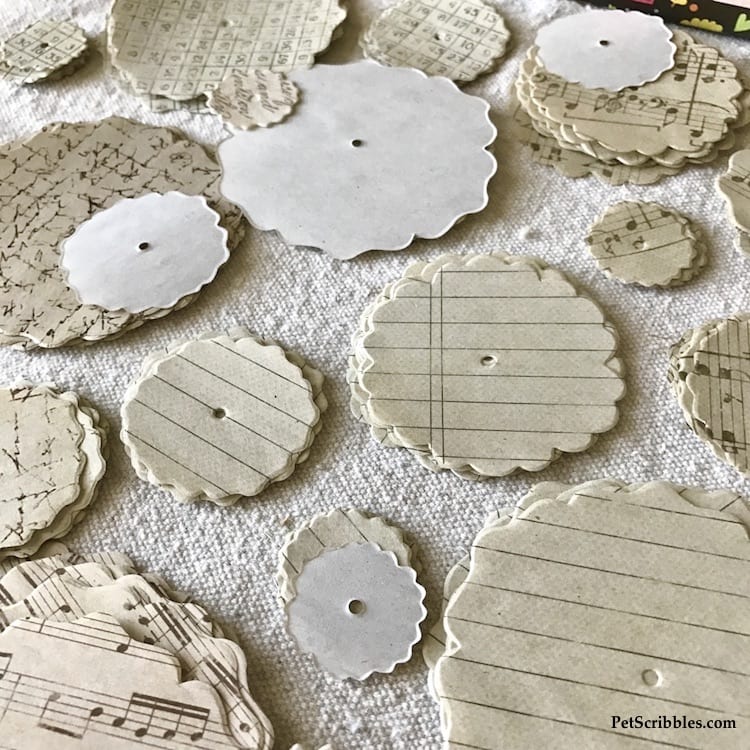
Aren’t the papers so pretty? I included the two pictures above so you could see the variety not only of the printed designs but also the slight variance of colors. Love, love love!
Helpful tip: If you need to exhale — whether you’re laughing out loud or sighing or doing your deep breathing exercises — do not exhale near your carefully organized die cuts as this will happen:
Yes, I let out a nice deep breath as I was almost finished, and ended up blowing these paper shapes all over the place, including off the work table.
Our cat Otto — who is always by my side when he’s not following our cat Lulu around begging her to play — saw these paper scraps fluttering through the air and . . . well you can imagine!
It was a race between me grabbing the die cut shapes and Otto pouncing after them. I won, but it wasn’t easy. I distracted Otto by giving him some crumpled up scrap paper to play with and all was well in our world. LOL
Ah yes, where was I?
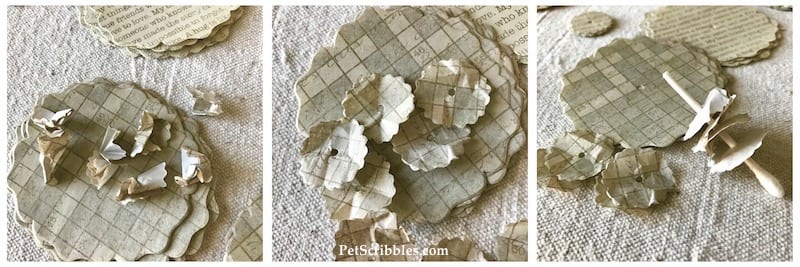
My original idea was to “simply” crumple up the die cuts, then add them onto a cotton swab — which would be the flower staman — and admire my work.
So I crumpled . . .
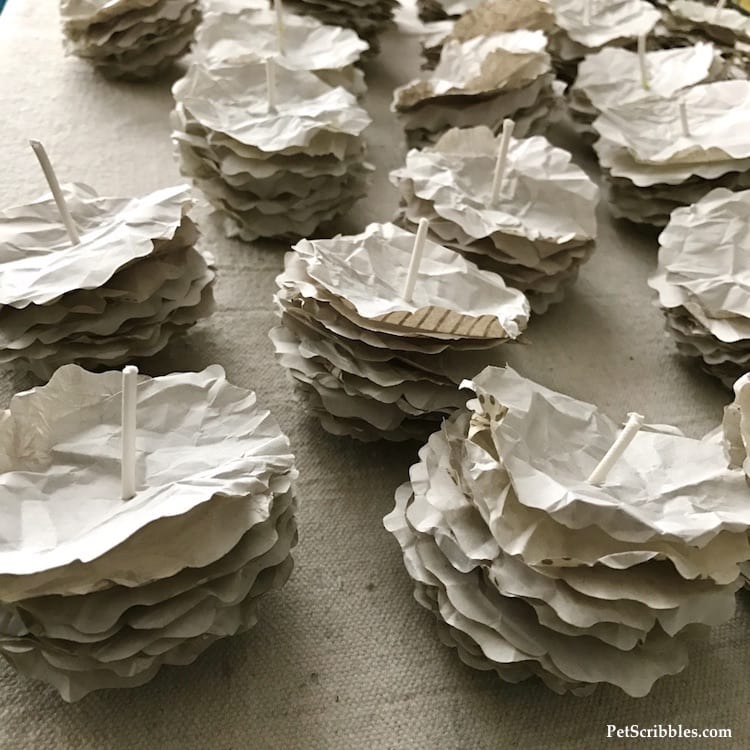
. . . and I stacked them onto the cotton swabs . . .
And when I was all finished — with all 24 flowers propped up on the work table — I didn’t love them.
I liked them, but didn’t love them. I wanted to love them.
So I left them overnight, spent time on the interwebs to get ideas, and quickly realized that using a water spritzer bottle was the key to proper crumpling!
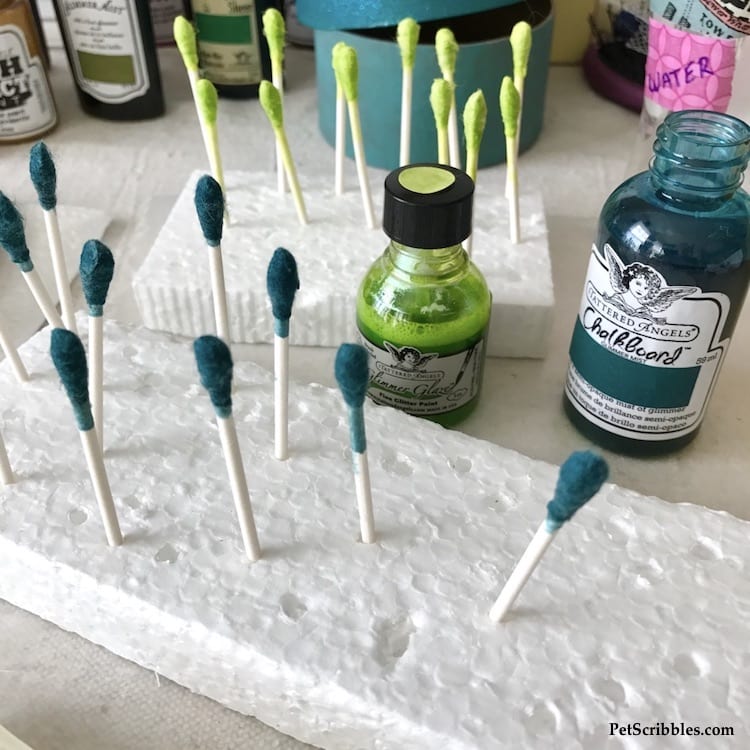
I also didn’t like the pure white cotton swabs, so I dyed them with Tattered Angels. I colored half of them a dark teal color, and the other half a bright Spring green color, then stuck them into a block of packaging foam to dry.
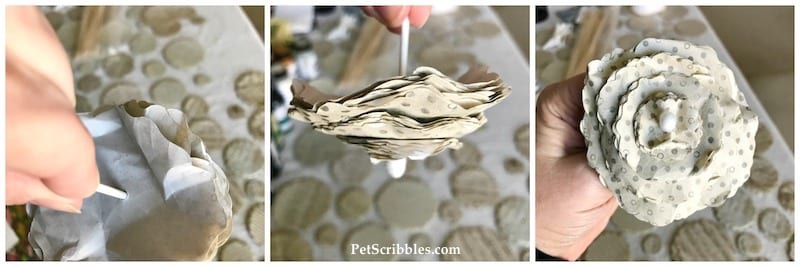
Misting the die cuts lightly before crinkling and crumpling makes all the difference!
It took awhile, but I went flower by flower and redid each one.
By the way, there are four sizes of die cuts for each flower. I wanted my flowers full so I have eight layers in each of the four die cut sizes per flower.
A. Lot. Of. Crumpling. 🙂
Once misted, any crumpling stayed crumpled. The crinkles remained crinkly.
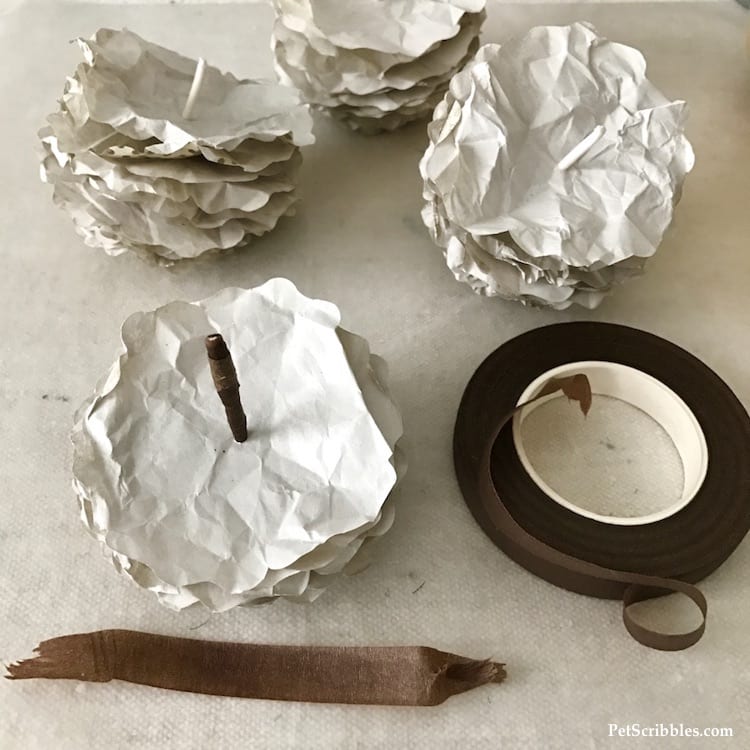
I wound brown floral tape (affiliate link) around the cotton swab, which also helped to keep the paper layers bunched up together.
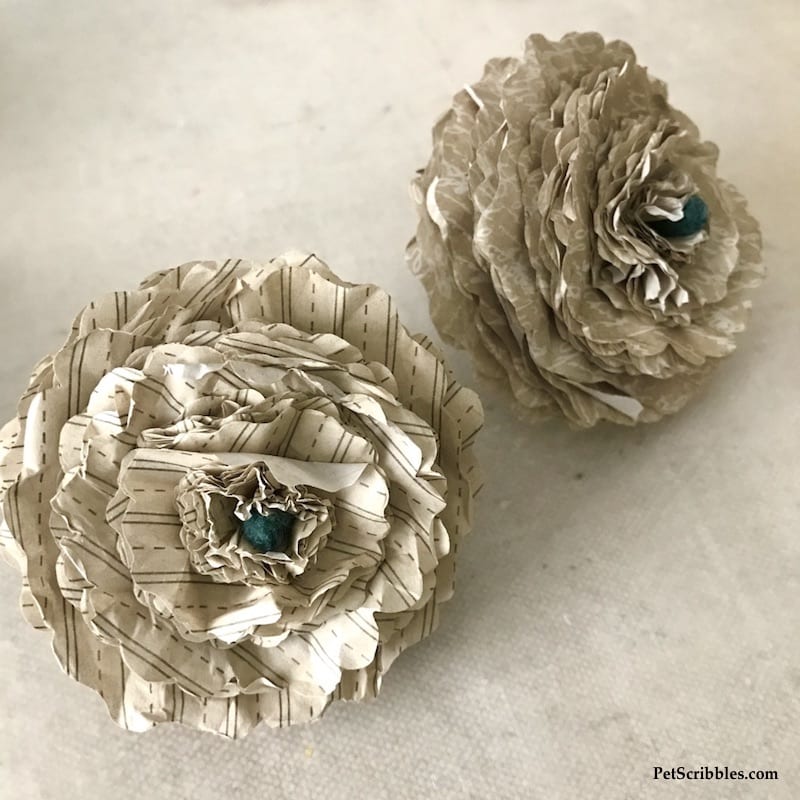
Now I had beautiful shabby flowers! Now I loved them!
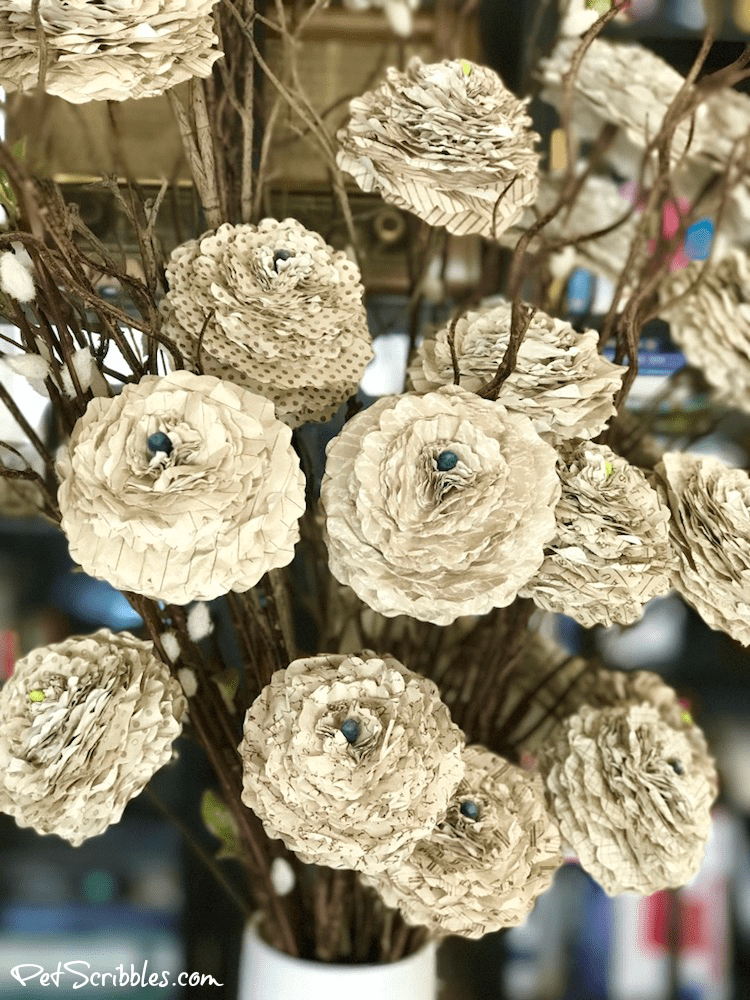
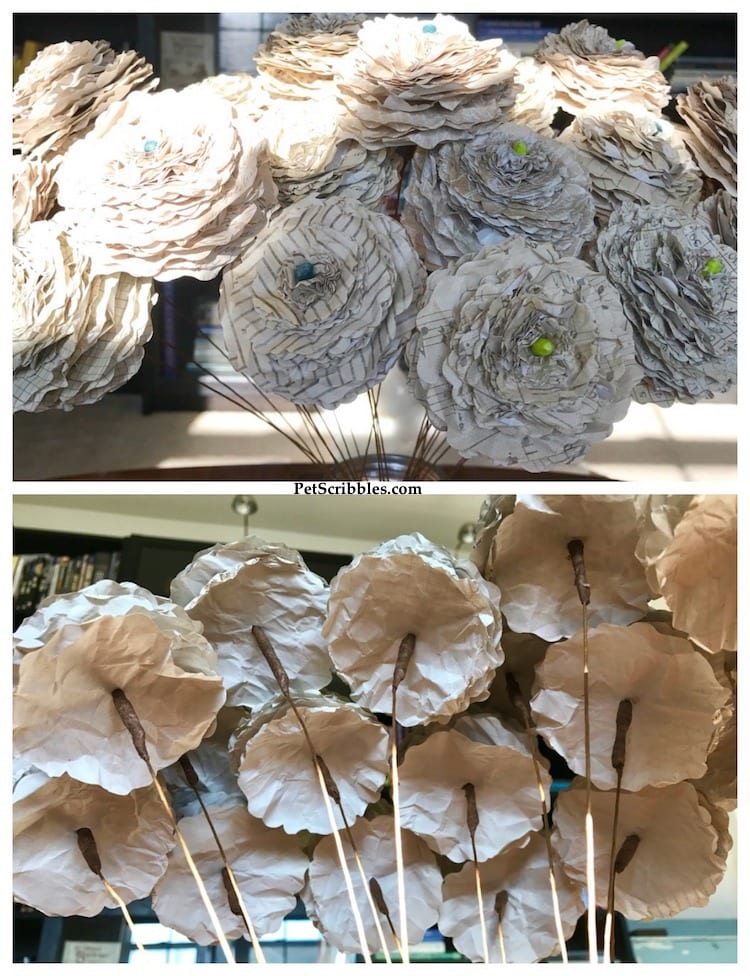
I used the brown floral tape to attach each flower to a brown floral stem (affiliate link). Here’s what the flowers look like all together:
You can see what the undersides of the flowers look like above. (The stems are dark brown but the sunlight makes them appear much lighter.)
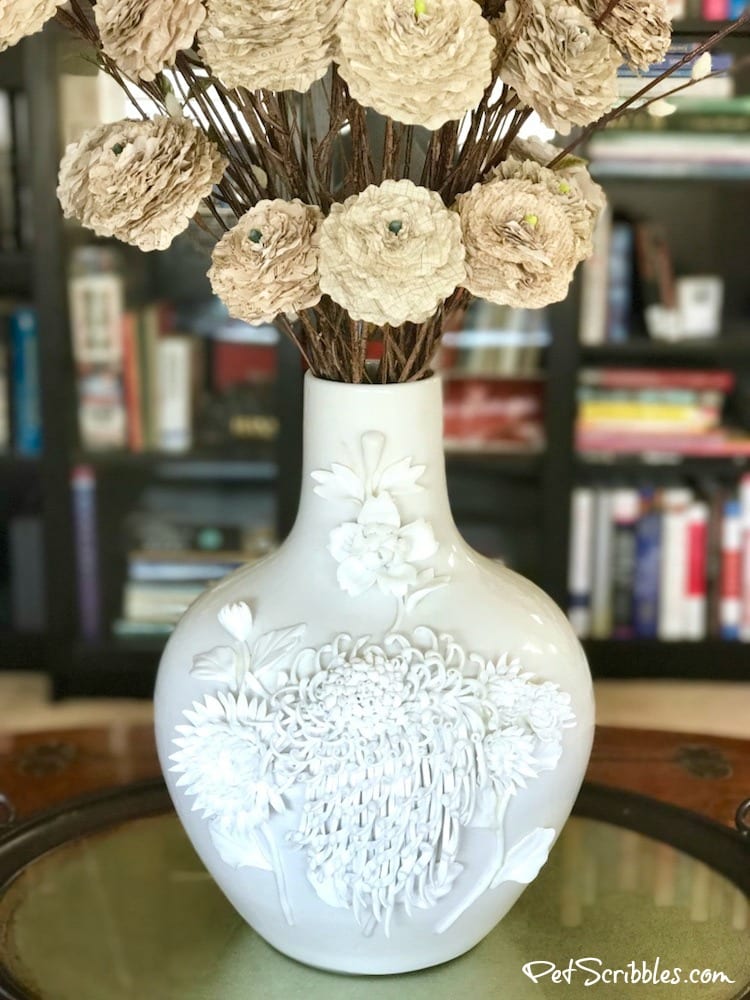
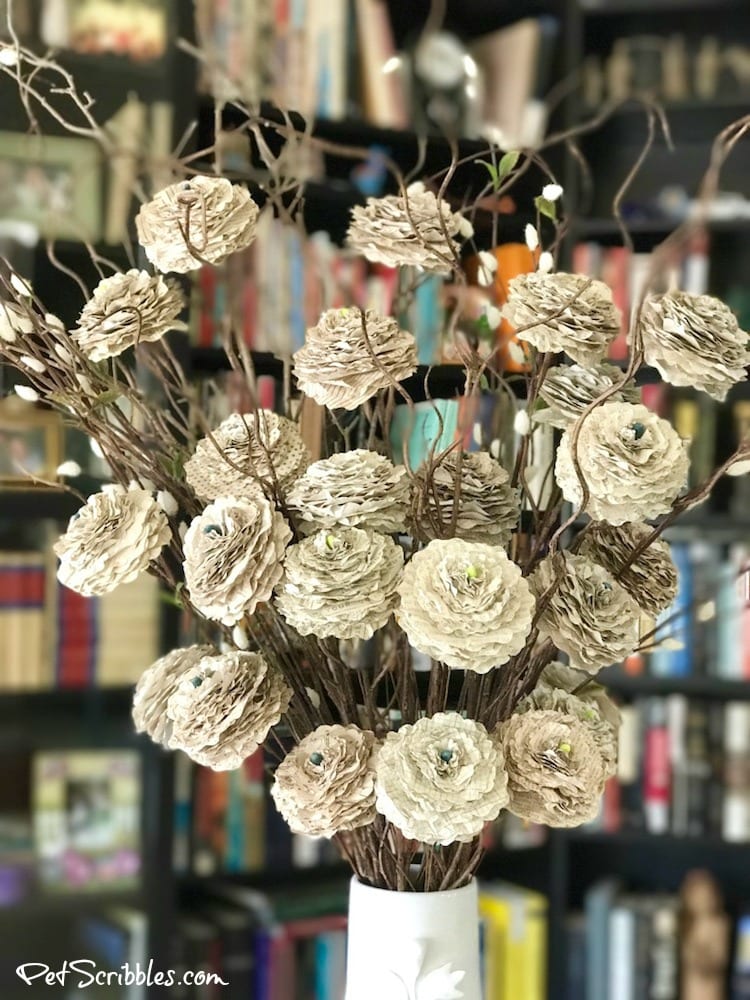
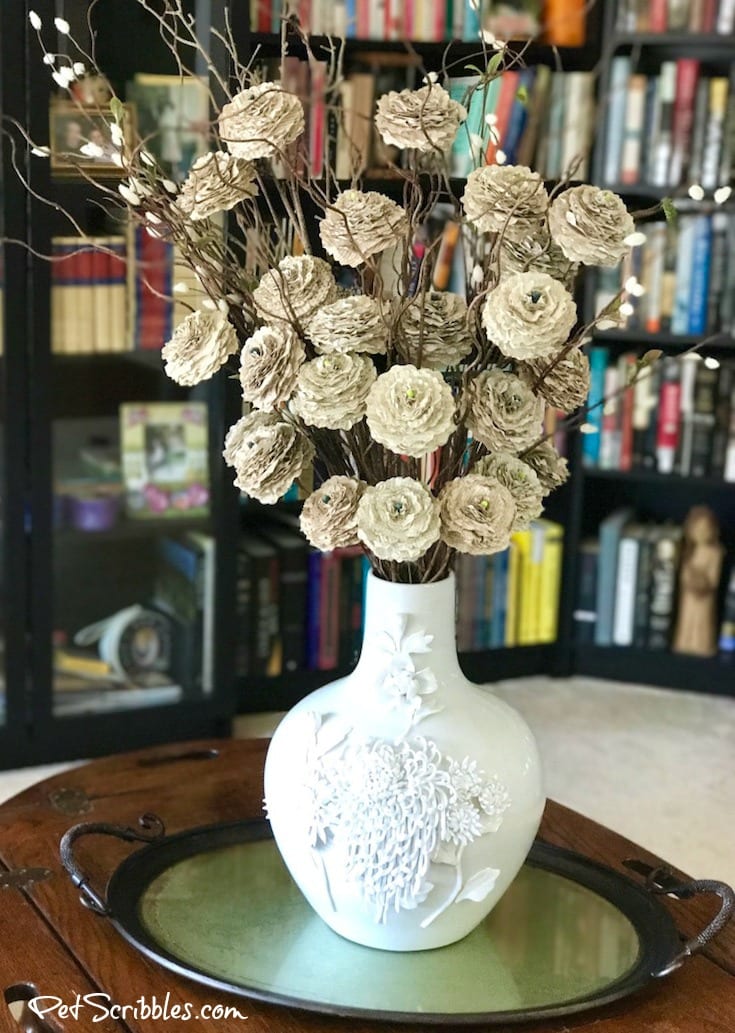
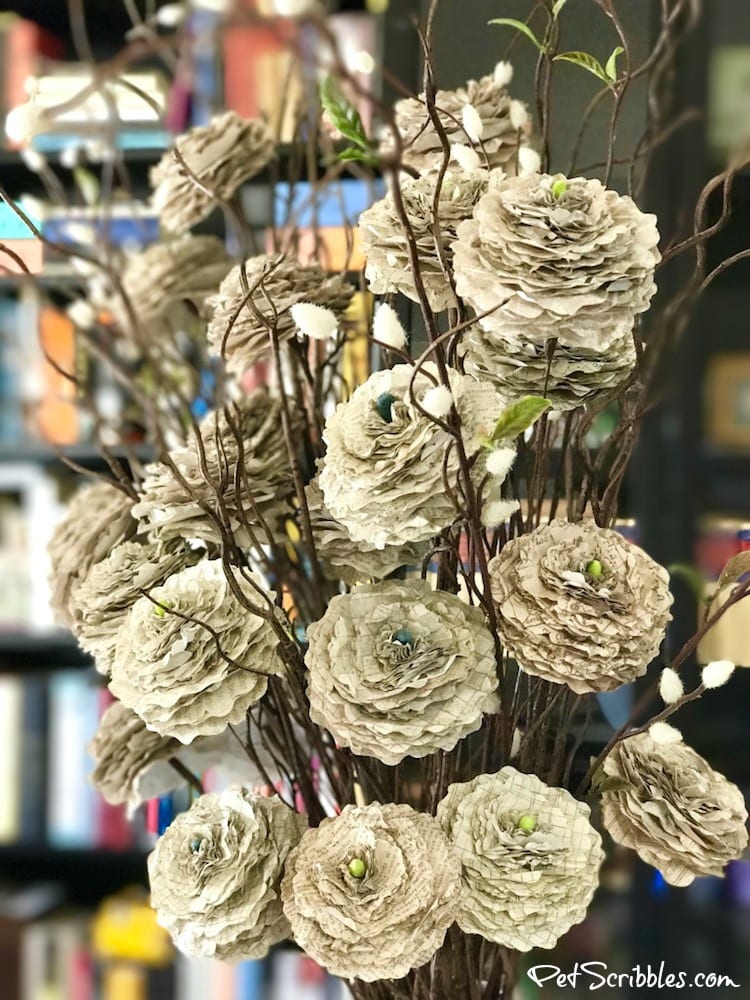
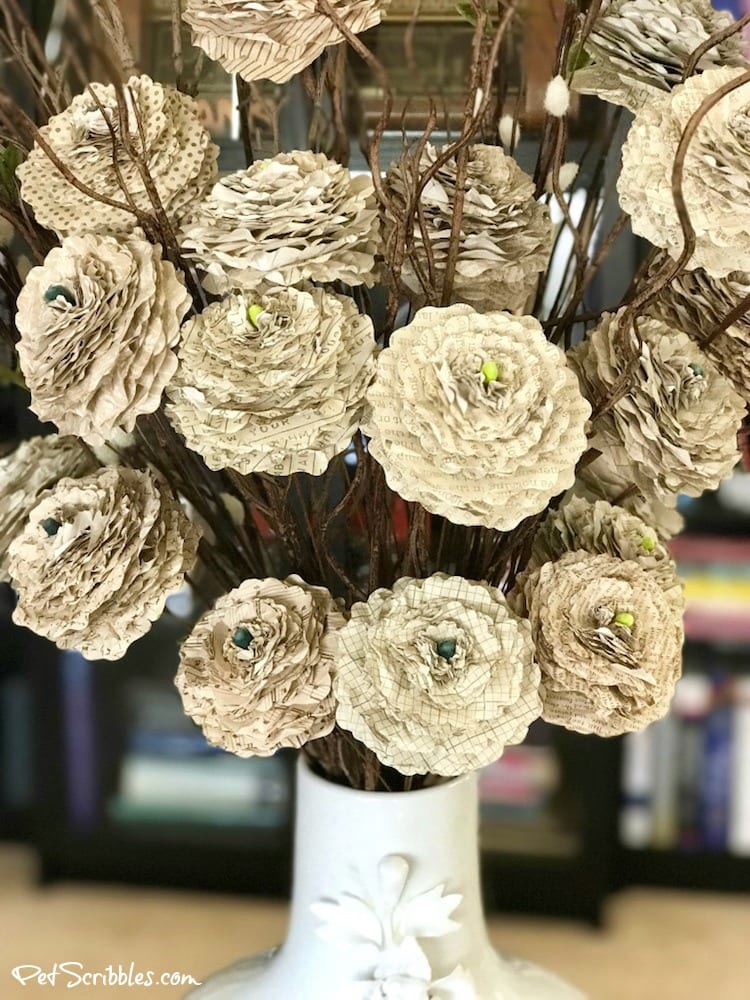
I arranged the paper flowers in our wedding vase among some faux twigs and pussy willow branches.
The vase is from Anthropologie (circa 2006), and we used it in our wedding ceremony to hold the single roses we gave to each other.
I really love how the flowers turned out. My husband loves them too, which is always a good thing!
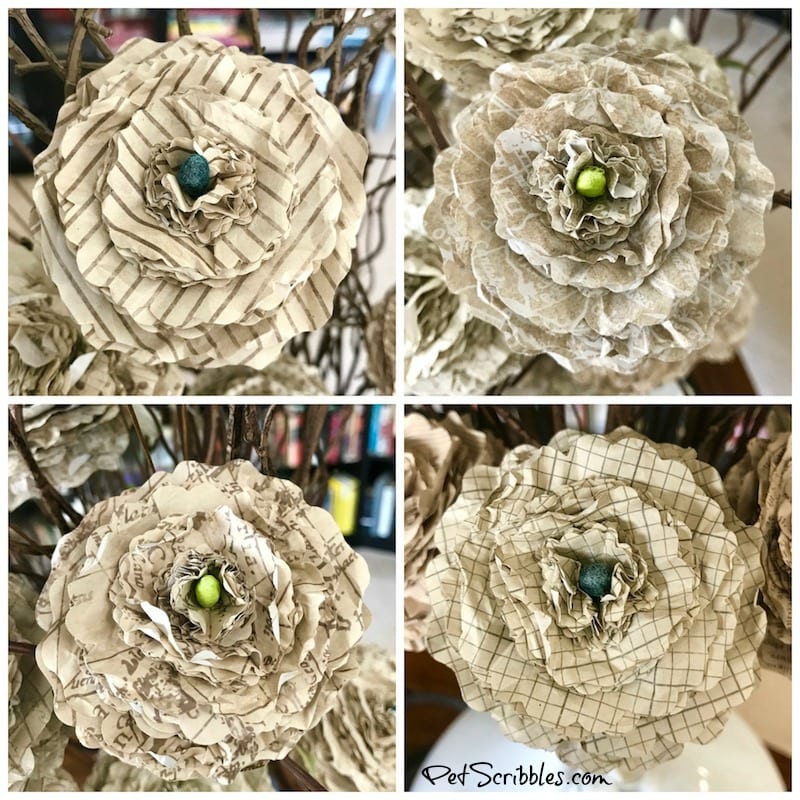
Here are a few close-up shots:
The fuzzy texture of the flower stamens (i.e. the cotton swabs) matches the fuzzy texture of the faux pussy willows.
The flowers also go with our decor…including Otto who supervised the photo session!
You will definitely be seeing more paper flowers as well as more die cutting here on Pet Scribbles from now on.
I can’t get over how much fun the Big Shot machine turned out to be. Fun with a capital F!
Happy crafting!
~Laura


Beautiful bouquet of flowers! Thanks for all the tips and hints, I love how your flowers turned out. I’m looking forward to seeing what else you put your BigShot into use for!
Beautiful flowers and arrangement! You did an awesome job witwith your detailed tutorial! Thank you!
You may be late to the Sizzix party, but you sure have livened up the party. Amazing. These flowers are so beautiful. And the additional cat story for entertainment purposes is wonderful too.
Wonderful flower display! Love how you made the flowers, thank you for sharing it with us! I will put that die on my wish list! xxx
Oh my goodness, Laura, these are absolutely beautiful!!!
Laura, I absolutely LOVE these! And I see a paper pack I need to be on the look out for 🙂 Hope you are well!
I LOVE your flowers so much, that I ordered the die for the petals. Can hardly wait to make them. Thanks for sharing and thanks for all the tips!!!